How to Build a Gaming PC – Beginners Guide

Share:
We decided it was about time to do a ‘How To Build A Gaming PC’ guide, where we basically walk you through things like organizing your components before building the system, plugging everything in properly, as well as taking a look at cable management, and giving you a few tips and tricks to make it look a little nicer. The intent of this guide is to simplify the process for everyone, and while it might sound a little complicated for newcomers, it really isn’t.


We worked with Corsair to make this guide possible, and they donated the majority of the components for this build, so thank you very much to them!


Starting off, you need a magnetic Phillips-head screwdriver, preferably two different lengths to get around. Then you will need a magnetic screw tray, preferably two or three of them so that you don’t lose or mix them. If you don’t have or can’t find a magnetic tray then you can use a plastic compartment tray, those are widely available.


Next up are cable ties for organization, good lighting so you can see what you’re doing, a stable work surface, and lastly anti-static wrap, which is optional. Rubber fan mounts from Noctua are a great addition too, but you can find them from other companies as well. You will also need an external hard drive or flash drive to create your Windows bootable media, as well as load up the drivers for the motherboard and the graphics card.


First and foremost, let’s start off with the shopping process. It is very important that you set a budget for your gaming PC, because you can easily run over that budget since there are so many choices of PC components out there. Next up – above anything else – do your research. Read or watch every review that you possibly can for the components that you are interested in, because you want to make sure that you are getting the best Bang for the Buck. This is your hard earned money that you are spending, and you want to make sure that you are spending it wisely. Don’t just rely on a single review, make sure to read or watch as much as you can. I know that’s time consuming, but trust me is it’s definitely going to pay off in the long run. Also, think about whether or not you are looking for a particular colour scheme for your gaming PC, because that can significantly narrow down the choice of components that you can use.


We encourage you to reach out to our community on the Hardware Canucks forums for some helpful build advice. Don’t be shy because we have a lot of friendly members waiting to help. There are also some other really useful tools, for example you can use PCPartPicker to start choosing your components and make sure that you stick within your budget. It can also help you shop for sales to get the best prices. Just watch out for shipping costs since they can get expensive. PC Building Simulator is another great way to visualize your build in 3D, but keep in mind that it doesn’t have all of the components that you might be looking for.


Now before you push that buy button, there are a few common mistakes that I have made in the past that I certainly don’t want you all to make as well. First of all, all-in-one liquid coolers like this Corsair H60 look great in the system, but make sure that your case actually supports the one you choose. Some cases don’t support 140mm radiators and the same goes for 240mm/280mm and larger coolers. The next thing that I want to talk about is RAM clearance, because if you decide to go for an air cooler you want to make sure that your memory modules don’t conflict with the air cooler during installation. In this case I decided to go with Corsair Vengeance LPX memory modules. They are low profile and should fit the build really well.


This next bit is very important, make sure that your motherboard has enough fan headers to accommodate the number of fans that you plan on installing on your PC. I have run into multiple occasions where I pick a motherboard and then while building the system I would run out of fan headers. I would then have to rely on splitters or external solutions to get some additional fan headers, it’s not the end of the world, but definitely something to keep note of. Finally, remember not to cheap out on your power supply, it is worth paying a little premium for a quality brand name. Also, it will cost a little bit more if you decide to go for a modular power supply, but that way you can choose to use only the cables that you need for your specific build. This will also help you cable manage your system really well. If you are interested in learning more about how to choose a power supply, make sure to check out our article right over here. We walk you through a lot of the steps that could potentially help you make your purchasing decision.


Now that you have your components in hand, what’s next? Because it is tempting to immediately put everything together once they show up at your doorstep, but there are a few things that we have to take care of before starting the build process. The first thing I like to do is get my Windows installation media ready to go, as well as the drivers that are required to get this thing up and running, including chipset drivers, Bluetooth, Wi-Fi, GPU drivers. They are all important because Wi-Fi is not necessarily going to be enabled automatically upon your initial Windows boot, so you need the drivers immediately available to set everything up.


I also highly recommend you do a fresh install of Windows on your brand new PC. It is tempting to reuse your old Windows boot drive, but I would not recommend that. Just do yourself a favor and do a fresh install of Windows. Creating a Windows installation media is pretty straightforward, all you have to do is plug in your freshly formatted USB drive onto your existing PC, head over to Google and search “Windows 10 download”. Click on the very first link, which will take you to Microsoft’s official site where you can download the Media Creation Tool. Once you do that it will run a setup utility that will fully prepare and load your USB drive. While that the utility is doing its thing, head over to your motherboard manufacturer’s website and download the drivers, as well as the updated BIOS. Also, download the GPU drivers, whether it’s AMD or NVIDIA, and have them all ready to go on a separate USB drive.


Now comes the initial hardware setup. Personally, I always build my system outside the case just to make sure everything is working properly. Yes, that takes time, but at least all your hard work won’t go to waste if something goes wrong with one of the components. Trust me, it happens often, and troubleshooting can be a pain in the butt. Basically, you can use the system installation part of this article to build outside the case. Just use the motherboard box as a platform for the motherboard and install everything onto it. If your motherboard doesn’t have an integrated power button, what you can use is a metal screwdriver and touch the power and ground prongs on the front-panel connector.


It’s time to unbox the motherboard and go over some of the things that you get with it. Now it all varies from one motherboard to the other, but you will get most of the basic things like an I/O shield for the back of the case, though some higher-end models come with pre-installed shields. You also get to SATA cables, this is important for connecting SATA hard drives and SSDs to the motherboard. Motherboards still come with an installation CD/DVD with all the software utilities and drivers, but that won’t be necessary if you downloaded the latest drivers from the website beforehand as we mentioned. Before we actually start building it is very important to minimize static electricity, so try not to build your PC standing on carpet while wearing socks. You can either wear a grounding strap or touch the metal of a case to discharge any static you might have on your body. The next step is to place the motherboard on its box, and this is the easiest place to install the processor, the CPU cooler, and the memory.


Time to install the CPU. In this case we are using an Intel processor, so what you want to do is open the socket cover on the motherboard and insert the processor into the socket with the arrow aligning on the CPU with the arrow on the socket. Close the socket and press down on the arm and the socket protectors should pop off. Now this Intel CPU does come with a little cooler, and even though we won’t be using it in this build, let’s talk about how it’s installed. What you want to do is position it over the CPU. push and turn to lock the tabs in opposite corners, and then the last thing that you want to do is plug in the fan cable into the CPU fan header on the motherboard.


These stocks coolers have fans that are usually pretty loud and they don’t really perform all that well, so let’s go back to the Corsair H60 all-in-one liquid cooler we showcased earlier. The installation can vary from brand to brand on aftermarket coolers, make sure you go over the instruction manual step-by-step and separate the components that you need to install on an Intel platform. Remember these aftermarket coolers are both Intel and AMD socket compatible. Most of these components do come labeled, so that will help you keep all the parts organized. I just follow the steps on the manual one-by-one to install the backplate for the AIO cooler.


The next step is to install the memory. In this case we are using Corsair Vengeance LPX modules, 16GB (2x8GB) to be more precise, and we are going to be running them in dual-channel mode. Two slots will be populated and those are usually the identically coloured slots furthest away from the CPU socket. Always make sure to confirm with your motherboard manual to make sure that you are installing the memory in the right slots. Align the indents on the memory with the tab in the memory slot and you just push it until it clicks.


Moving on to the M.2 SSD installation, and I do want to mention that they can vary from one motherboard to the other. In this case with this ASRock board we have three M.2 slots, with one of them at the bottom being covered by a heatsink, whereas the other two are just left open. I’m going to be using the slot with the heatsink, because that not helps dissipate the heat coming off of the drive, but it also keeps it discretely hidden. All you need to do is remove the screws off of the heatsink, remove the sticker from the thermal pad that makes contact with the top of the drive, and then just install the M.2 drive into the slot. Lastly, you need to secur it with the included screw that comes in your motherboard box. It is highly important not to lose the screw because it is very small, so small that you might have to change your Phillips head screwdriver bit to a slightly smaller one. Once you have installed your M.2 drive the next thing to do is to put the heatsink on top and then secure it with the included screws.


Now it’s time to start preparing the case, and I’m going to say this very seriously: Read the instruction manual if your case comes with one. It can give you helpful hints and can even show off features that you didn’t know existed. It will also tell you which screws to use and where. What I like to do is remove the two side panels and set them aside. It’s also important not to remove the plastic covering on the side panels, whether it’s tempered glass or polycarbonate plastic, because that way you don’t scratch them easily during the building process. Taking off both side panels is actually pretty straightforward, some cases come with thumb screws so it’s easier to get them off of, whereas others come with standard screws that require a screwdriver to remove.


Next step is to lay down the case and start installing the standouts, but the Corsair Carbide 100R comes with standoffs pre-installed, which is awesome. This case can support up to ATX motherboards, which is standard, but if you do plan on using a larger EATX motherboard it is important that you make sure that your case can actually accommodate one, so do make sure to check out compatibility list on the case manufacturer’s site.


The next step is to install the motherboard, but before you do that make sure that you have installed the I/O shield on the case. Just pop that into the back and make sure that you have the layout aligned to the motherboard. When placing the motherboard inside the case remember to be mindful of the standoffs, since not doing properly aligning the motherboard with the standoffs could lead to a short. Fasten down the motherboard using the proper screws that come with the case.


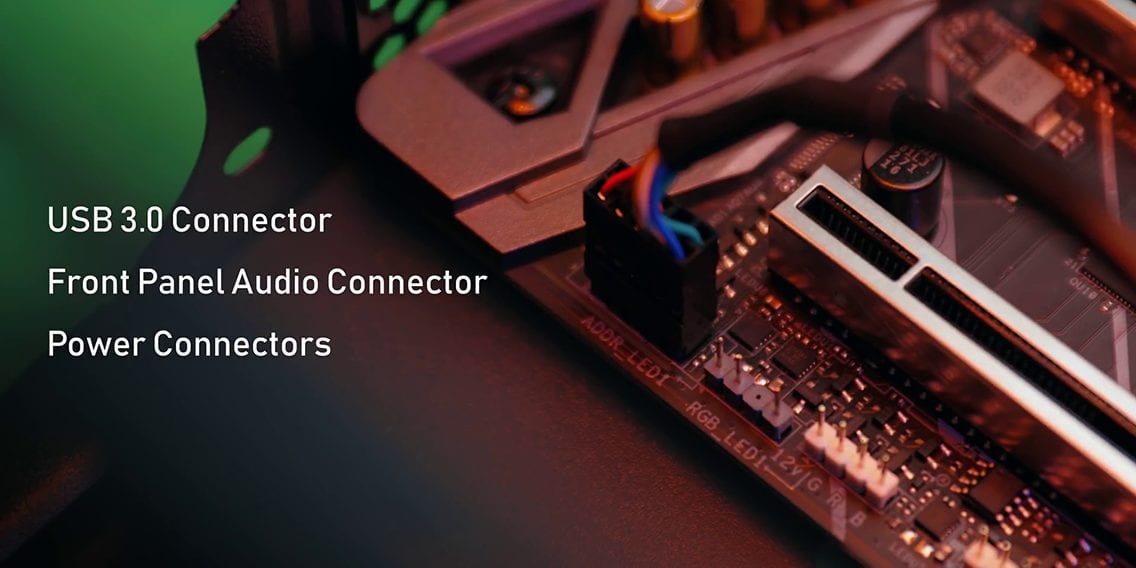

Now it’s time to start connecting the front panel connectors. It is highly important that you plug everything into the right pins, just so you don’t run into troubleshooting later on and are then forced to spend hours trying to figure out why the system isn’t booting. At this point in time, I would highly recommend keeping your motherboard manual by your side and referring to the front panel connector layout in order to properly plug the respective power LED pins, hard drive LED pins, power switch, and reset switch.


The next step is to install the all-in-one liquid cooler, and in this case we have already installed the backplate on the motherboard. Now all we have to do is remove the rear 120mm fan that comes with the case – because that’s where we are gonna be installing the 120mm radiator – along with the fan that comes with the cooler. You want to make sure that the tubing isn’t tangled. Some air coolers or all-in-one liquid coolers require the user to add thermal compound on top of the CPU, but the Corsair H60 comes with thermal compound pre-installed on the CPU block. All you have to do is just mount that on top of the CPU and then secure it with the included screws in opposite directions. The next step is to plug in the pump into the CPU fan/pump header, and not the regular CPU fan header. Remember we are installing an AIO cooler so it’s important to differentiate the CPU headers by referring to the motherboard’s manual. Powering the pump requires either a SATA or Molex connector – the Corsair H60 uses a SATA connector – so you will be plugging the pump to one of the power supply’s SATA cables. I will walk you through this process a little bit later in the article.


Now it’s time to install the fans. In this case I’m using Corsair’s AF120 LED fans, that come in a pack of three. The good thing is that they don’t require an external controller, you just simply plug them into the fan header and you get this really cool subtle red LED lighting. I’m going to mount two of these LED fans at the front of the case, and in order to do that I have to remove the front panel by simply pulling the tab located at the bottom of the case.


Once that’s done I use Noctua’s anti-vibration mounts to secure the fans to the front. Now do keep in mind that the Corsair Carbide 100R supports dual 120mm fans, so I had to remove the hard drive cage initially to secure them firmly through the appropriate cut-outs and then reinstall the cage afterwards. The remaining fan goes on the top and I used the included screws that came with the fan to secure them. Now it is important to understand push-pull fan directions. Most fans do come with little arrows on top of the fan frame to let the user know which direction the fan directs the air. We feel that for good air flow you should have the same number of intake and exhaust fans, so hot air is quickly replaced by fresh air on an almost one-to-one basis.


The next step is to install the hard drive for your game library, and it’s actually very simple. Most cases do come with hard drive caddies that can simply snap onto the hard drive for a more secure fit, and you can them simply slide the caddy back into the hard drive cage. After all you just need to use the included SATA cable that comes with the motherboard to connect the hard drive to the SATA ports on the motherboard.


Time for the power supply. In this case we are using Corsair’s CX450M semi-modular PSU. Out of the box you will get a set of sleeved computer cables and the main power cable that connects to the electrical outlet. As with most power supplies, the cables include a main 24-pin motherboard connector, an EPS12V 8-pin CPU connector, two 6-pin and 8-pin PCIe connectors for the graphics card, four SATA connectors for the hard drive and the AIO pump, as well as Molex connectors for various peripherals.


The next step is to plug the required cables into the PSU, to mount it inside the case underneath the motherboard, and then to secure it with the respective screws that come with the case. Make sure you mount it the PSU fan facing towards the bottom for proper airflow. Then what you want to do is route all the cables through the nearest cutout beside the power supply to the back, and then bring the 24-pin cable through the side cutout beside the 24-pin connector on the motherboard, and plug it in. The EPS12V 8-pin CPU cable should be routed through the top left-hand side into the CPU connector on the motherboard. Next we are going to plug in the SATA cable for the hard drive and the AIO pump connector, which is very straightforward.


And now comes the best part of the build, which is installing the graphics card. Once it’s unboxed, set it aside and proceed towards the case where you need to remove the PCI covers located at the back. This involves removing the side bracket that secures the slots, as well as the two PCI covers for the GPU. Remember your GPU should always be installed in the motherboard’s top PCIe x16 slot, so carefully align the GPU to the motherboard, slide it in until you hear it click, and secured it with the screws that were initially removed for the PCI cover. Some GPUs don’t need external power, but ours does, so let’s plug in that 8-pin cable.


With the system fully assembled I can now hook the PC up to the display, the keyboard and the mouse. Now before putting on the side panels it is very important to do a first boot test to check that everything functions, and then to take a second look at cable management / finish tidying up the insides. I know it’s tempting to that all that stuff before the first boot, but you should always make sure that the system works first. In order to do that, we got to make sure that the power supply switch is turned on, and if it is you should start seeing some LEDs light up in the case.


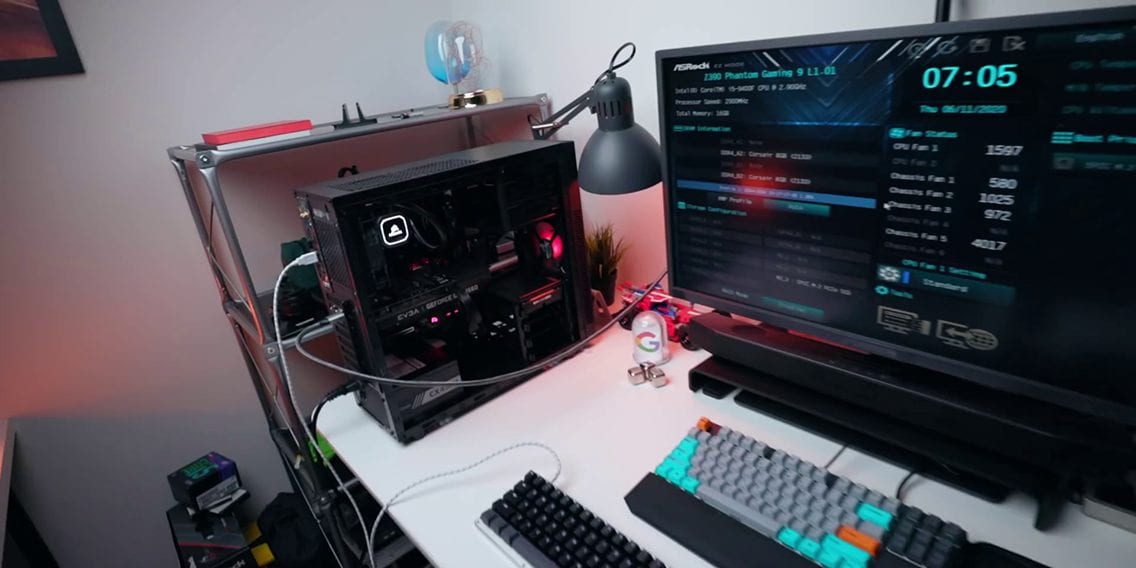
We have LEDs on the motherboard, which is a good sign, so I guess now it’s just a matter of turning on the system. Now upon first boot the system will probably power on for a bit and then shut down, this is to be expected. It is supposed to boot a couple of times just because it’s initiating the hardware, but sooner after you should start seeing the manufacturing boot up screen on your display and then you will see the POST screen. At this point, since you know the PC is functional you should turn off the PC by just flipping the power supply button, and then finish up with any cable management and throw on the side panels.


I’m going to quickly go over cable management and to be honest with you I like using the cable ties that come with components rather than zip ties, because that way you can re-route them without having to cut them. I just wrapped the extra 6-pin PCIe connector going into the GPU with a cable tie s it doesn’t stick out. I did the same with the front panel connectors at the back, it just makes it easier to find them if you have to upgrade certain components later on. Find little spots here and there where you can tuck away thinner cables and I think you will be happy with the end result. Lastly, install the side panels and secure them with the included thumb screws.


At this point it’s time to plug all your peripherals to the PC, and remember to plug in the USB Windows installation drive because it’s now time to install Windows. You should first boot into the BIOS since we are going to switch a few settings. The first thing you want to do is Load Optimized/UEFI Defaults within the BIOS, which allows the system to run at its best default settings. Finally, without changing anything else, we are going to find the boot override option, which should be at the very end of the BIOS and select the USB drive that you have created. Hit enter and you will immediately be brought to the Windows image on the flash drive, then just go through the steps of installing Windows.


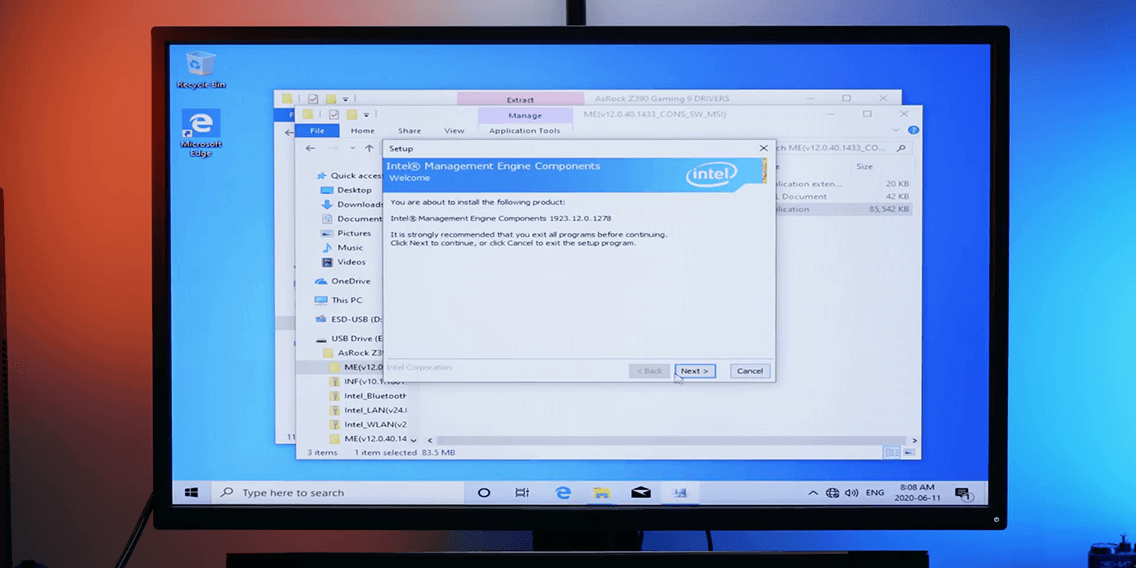

It should be pretty straightforward, and once Windows is finished installing you should be directed to the desktop screen. Remember all those drivers I had you save on another flash drive? Well this is where you get to use them. It’s time to install a ton of stuff, starting with the chipset drivers, management drivers, Bluetooth and Wi-Fi/LAN drivers so you can get onto the internet, if the system didn’t do it already. The next few steps should be to allow Windows to finish all of its updates, so that those don’t get in the way of your GPU driver install. Trust me, you will thank me later. With all of that done, I’m now running the latest version of Windows and all that’s left is to install the GPU driver, which is generally pretty straightforward.


You might have to initialize your secondary hard drive to start loading them up with games, so I will walk you through that process. Head over to Start area, type in “Disc Management”, and that should open a window listing the disks that you have installed on the system. You should be automatically prompted to initialize the disk, but if it doesn’t, right-click on the disk that is unallocated, choose initialize, and then go through the process of creating a new volume. Name the new drive whatever you want and your drive should be ready to go.


And that’s it, your system should be perfect and ready to rock and roll. All you have to do now is download some apps and games and start enjoying your new computer! I hope that this guide allows a lot of newcomers to build their gaming PCs confidently without having to worry about missteps, mistakes, or just breaking components. Honestly, it’s very simple as long as you follow the steps carefully by reading this guide and the instruction manuals that come with your hardware. I believe you should do just fine, Good Luck!
You can buy some of the items in this article from Amazon at the links below:
Magnetic tray: https://geni.us/MAGTRAY
Screwdriver kit: https://geni.us/pRzf4
Rubber fan screws: https://geni.us/ftpQp
USB Drive: https://geni.us/CorsairUSB