I Tried To FIX The Corsair A500 Air Cooler!

Share:
Hey everyone, it’s Mike here with Hardware Canucks again. As you get to know me a little bit more, you’re probably going to realize that when I see some of the reviews and articles that we put out I want to do something a little bit different with them. By that I mean that I want to take them to the next level, and that’s where this article comes in. Let’s call it an A500 Redux.

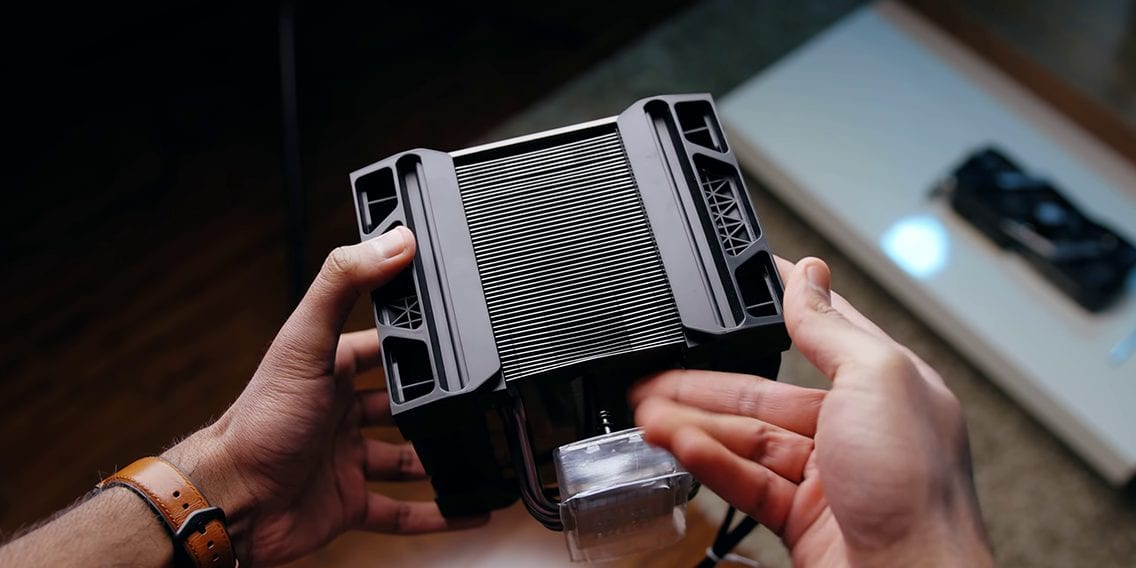


This is the Corsair A500 air cooler, and we found some pretty glaring issues with Corsair’s claims that it was rated at 250W. We identified a bunch of areas that Corsair could have improved, so I wanted to try a couple of the theories that we had, and a couple of the fixes that we and you all shared with us.


After testing this cooler, Eber and I noticed that there was three major areas where Corsair could have improved things. One of them was the base finishing quality, it’s quite rough. Another one was that there’s a void in between Corsair’s two fin arrays, and that could be causing some airflow problems from one area of the cooler to another. Finally there was the fans, the fans we sort of addressed in that original review by replacing them with Noctua’s, but it’s actually the first thing that I wanted to talk about in this article.


With those Noctua fans offense installed we actually saw a pretty significant performance increase, but we really wanted to take things to the next level and that meant addressing Corsair’s brackets. While these brackets look really good – and they function amazingly – we noticed that there’s a small lip around the bracket that prevent the fans from making direct contact with the heatsink itself. What that can cause is a loss of air flow if it tends to flow around the heatsink instead of going through it. Corsair sort of took care of that by adding a baffle, but I wanted to see what would happen when we put those Noctua fans directly up against the heatsink and avoided Corsair’s brackets altogether.


My idea with all of this is really to go for a cheap and cheerful approach. Because of the fact that Corsair really doesn’t allow you to mount any other fan onto here, other than ones that use their own brackets – and trust me we have tried brackets from Noctua and be quiet! – nothing else works on here because of the rail system. The cheap and cheerful approach is that we are going to be using some regular zip ties. It’s not going to be pretty, but it’s going to work enough for us to get some benchmark numbers. I do hope they don’t melt though. One of the problems is that there isn’t much space in between the heatsink fans, but we still managed to do and have it dead-center so that it’s equally spaced everywhere, which is perfect. The first phase is done, and that’s to strap on these Noctua fans. It looks really bad, but at this point in time we’re just going for that flush mount, and we got as flush as we could. Now the last thing is to install this new & improved back onto the motherboard and see if this gives us any improvements. If it does, we just keep these on and we move on to the next step.


With the two Noctua fans flush mounted and the results are a little bit confusing, but I’m going to explain them. First of all, starting with the stock settings and with the fans at 1,000 RPMs, we only saw about a 2°C difference, and that’s well within the margin of error. But then when we go to the overclock settings, this thing still gets completely overwhelmed by the thermals put out by the processor. The flush mount fans did not do a thing, regrettably.


Moving on to phase two, and what we wanted to do is to take a fan and put it into the void between the two fin arrays. What I wanted to do is take a Noctua fan and just put it in there. The problem is that most standard fans are 25mm thick, and for whatever reason Corsair made the void’s opening 23mm. Therefore we had to move on, and we found the slimline NF-A9x14 in our fan collection. It doesn’t have the same kind of static pressure rating as the thicker fan, but at least it fits. Ultimately it took us about a half hour to figure this out because we needed to find a way to not hang this thing but actually make sure that the fan is flush-mounted and drawing hot air in from the right side and pushing out to the left side. The only way that we really found to do that is metal wire, and at least is not going to melt because I’m pretty sure this thing’s going to get very hot. We are going to thread it through the holes and the sides of the heatsink.


The fan installation worked well and this is what it looks like. There are two pieces of metal wire and then there is two shims further down there so the fan doesn’t go all over the place when it starts actually working. The idea here is to draw in air from one side and quickly draw it out of this dead zone into the other so that it gets exhausted outside the case. The question is will it work?


Well we finished the testing and the results weren’t quite what I was expecting. With the third fan installed we didn’t really see a drop in temperatures in any way, shape or form. However, if you drill down into the results and the logs that we took, it took a lot longer for the heatsink to reach that temperature with the third fan installed. Instead of it taking about 10 minutes, it took about 20 minutes for it to reach the temperature that we saw. But moving onto the overclock results, again, there was absolutely no difference. This is with three fans moving at 2,000 RPMs. But I had a little bit of a hunch, so I took out our FLIR camera and I did a couple of pictures. The heatsink is actually cool to the touch, and that’s really weird, but it tells us a lot. It tells us that the heat from the processor isn’t making it up through the heat pipes and into the fin array. That can mean one of two things, one is that the base isn’t making proper contact, but we have already seen that and we are going to address that. The other possibility is the fact that there just aren’t enough heat pipes to efficiently conduct the heat from the processor upwards.


So what’s the next step that I want it to do? Well it’s actually the one that I should have done at the very beginning, because as you can see I have to take this whole thing apart because in order to de-mount the cooler this third fan can’t be in the middle. I’m basically going to take this kit of sand paper that goes from 400 grit all the way up to 3000 grit and use it to lap the heatsink base. It’s been like 13 years since I’ve tried to do this, and I know it’s going to be one hell of a process, but I want to see if we can actually get that heat transfer to improve a little bit.


I have my lapping stations set up here with wet/dry sandpaper, making sure that I have some water relatively close by, and I noticed something really interesting. As I was lapping I started out a little bit lower grit – about 320 – and as you can see above material is being taken off the bottom of the heatsink. However, this one heatpipe was a little bit torqued in one direction and it actually made a raised spot on the case, so my goal right now is to try and whittle down this area to make sure that this it is no longer there. As I get on to higher and higher grits of sandpaper I’m going to try to a smoother base and maybe even a mirror shine.
All right, final update, this is where we stand. I went all the way up to 3000 grit and you can actually see that it is pretty a mirror base, but I want to explain the ridge that it still visible on the base. There is heatpipes and there is a very like micro meter curve to it that I have worked hard to polish down. I think it’s time to take this to the test bench, and to cross my fingers that I haven’t taken off too much material because if I did then the mounting mechanism probably won’t work properly.


And did it work well? Yes and no. And I’m going to be recite something that one of my grade school teachers told me, which is that sometimes you have to fail some to succeed. In this case, I spent two hours of my time and all this testing and in the stock results we got amazing temperatures. These are 12°C cooler than Corsair’s stock results, so Corsair if you’re watching right now we fixed your cooler, at least for 165W TDP. However, when we go above that and we went into overclocking, we didn’t see one bit of difference. I think my original theory was correct and that was to say that there just aren’t enough heatpipes transmitting the heat from the processor into the fins.


So where do we go from here? Well we are going to stick to our review’s conclusion and that is we don’t recommend the A500 for a high TDP processor. It should not be rated at 250W, and shame on Corsair for doing that because I don’t know where they got that number from. Instead of wasting your money and your time like I did to fix something that shouldn’t be broken in the first place, I’m just going to say to look at something from Noctua, look at something from be quiet! if you’re running a very hot chip. That’s pretty much it for this article, I had a ton of fun doing this, but regrettably the results were a little bit mixed.